Get stuck in to these Halloween crafts, recipes and DIY decorations. These will be perfect for your Halloween party and celebrating spooky season. They could also be part of a boo basket! Remember to ask an adult for help with these and ensure supervision at all times. Now, let’s get crafting!
DIY Glow-in-the-dark slime
This glowing goo will be so much fun with friends, especially when you turn the lights off!
Materials needed:
Clear glue (125 ml)
Baking soda (15 ml / 1 tablespoon)
Contact lens solution (15 ml / 1 tablespoon)
Glow-in-the-dark paint or glow powder
Black food colouring (optional)
Instructions:
1. In a bowl, mix 125 ml of clear glue with 125 ml of water.
2. Stir in 15 ml (1 tablespoon) of baking soda.
3. Add a few drops of glow-in-the-dark paint or glow powder and mix well.
4. If you want a spooky colour, add a few drops of black food colouring.
5. Slowly add 15 ml (1 tablespoon) of contact lens solution while stirring until the slime forms.
6. Knead the slime until it becomes stretchy.
7. Turn off the lights to watch it glow! Ooooh!
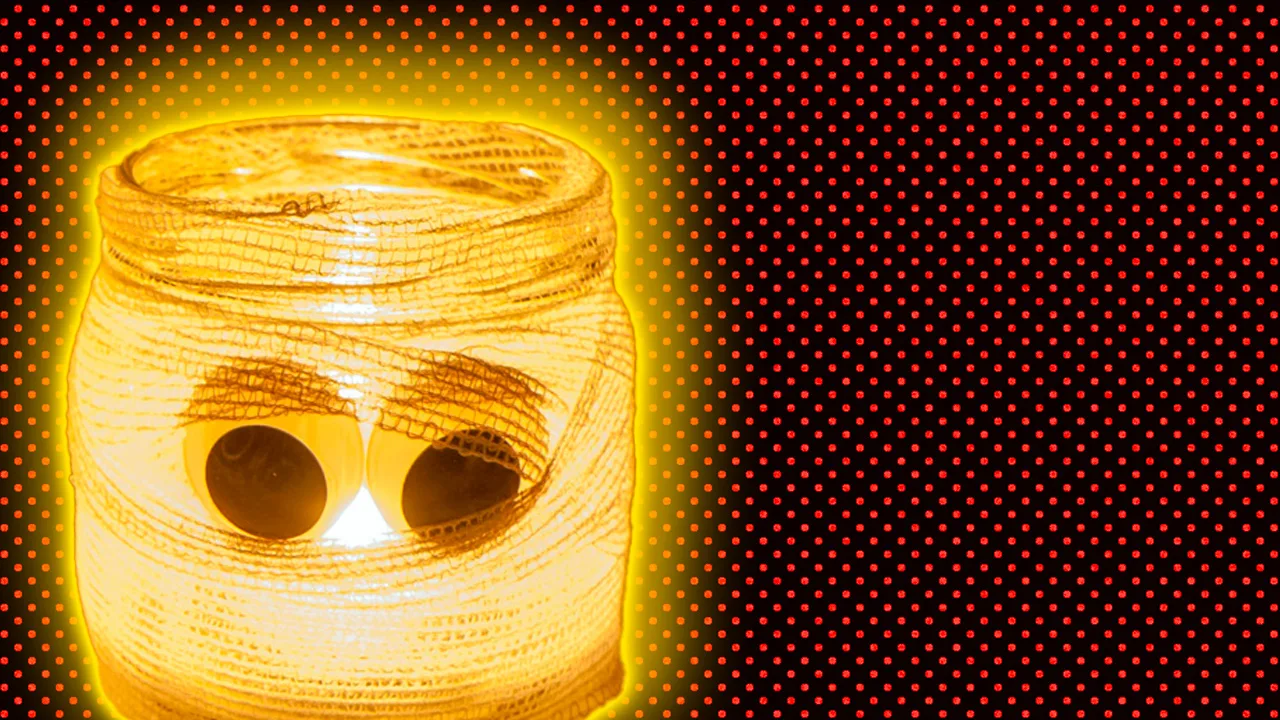
Spooky jam jar lanterns
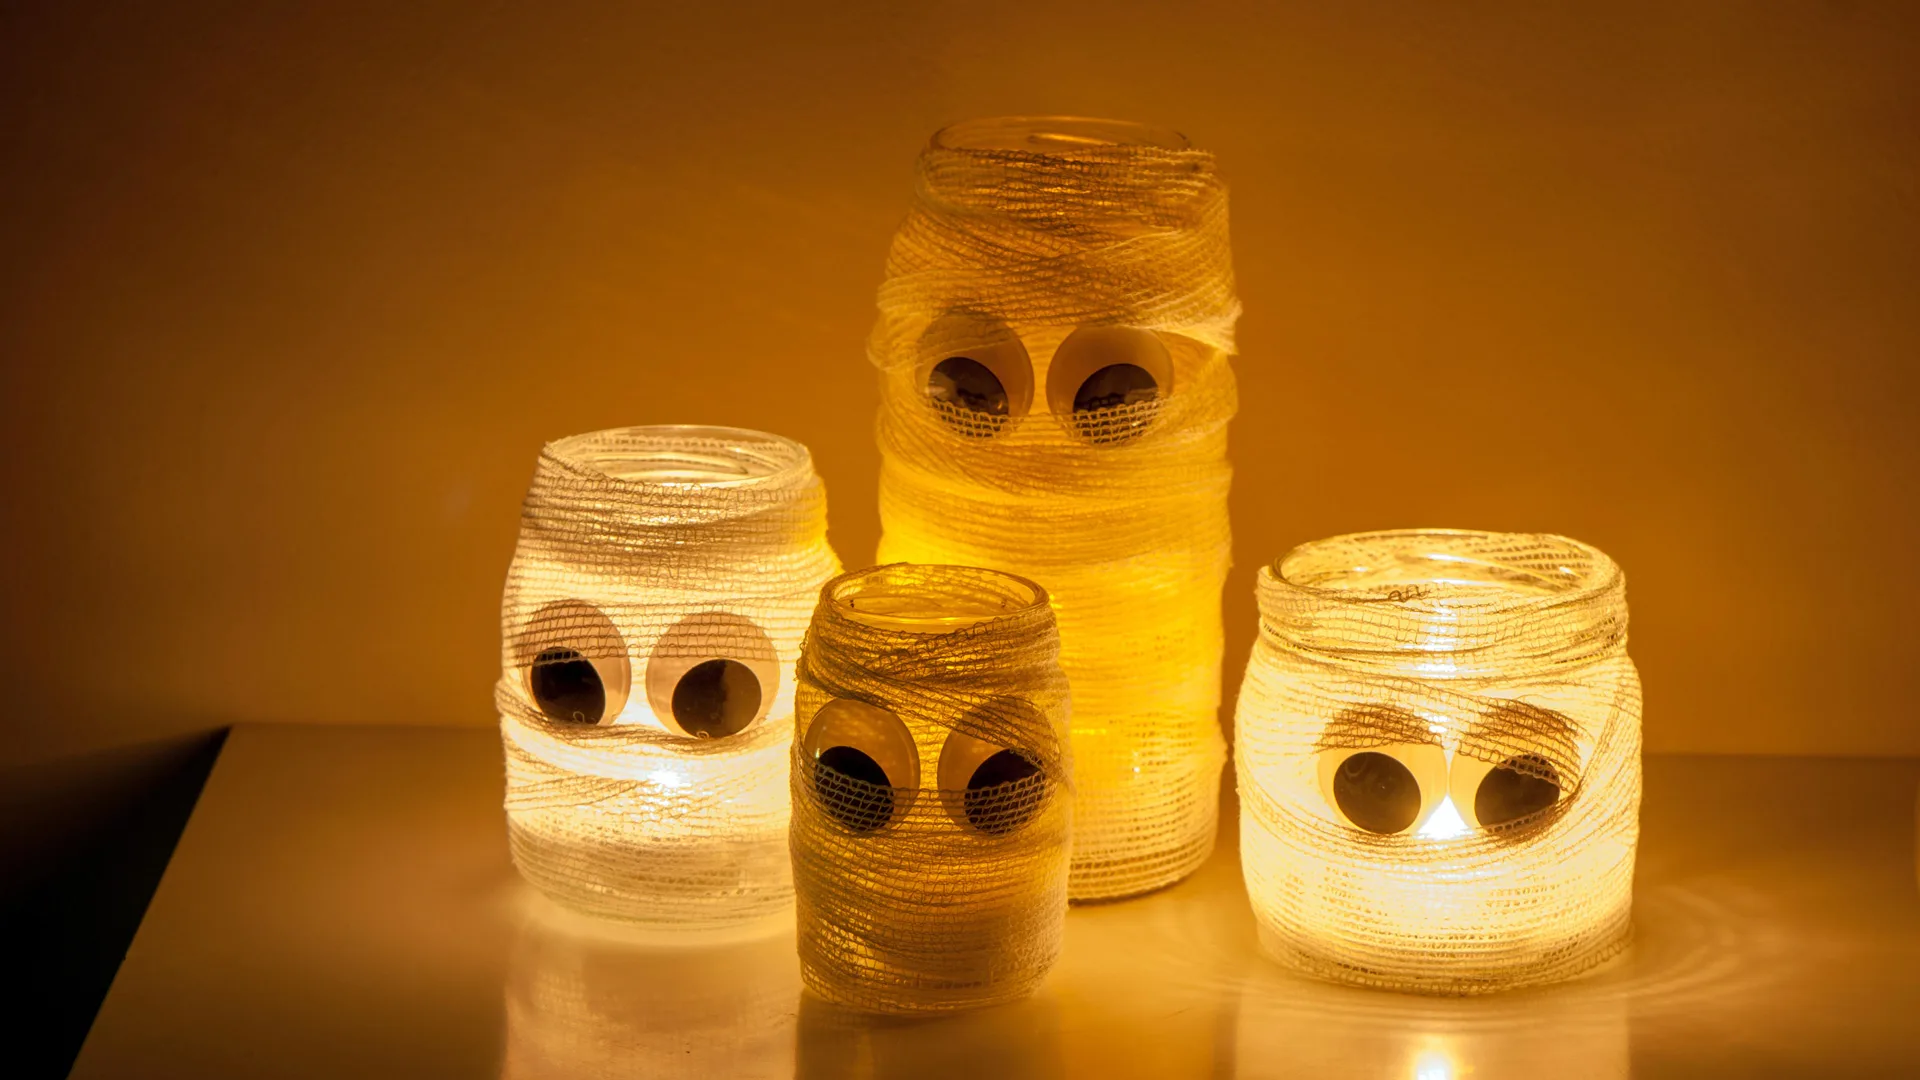
These lovely little lanterns will make a great additional to any bedroom. Cosy and cute (and a little bit creepy).
Materials:
Jam jars
Bandages in a roll
PVC glue
Giant googly eyes
Scissors
Battery-operated tea lights
Instructions:
1. Cut the bandages into the length needed to wrap around the jar.
2. Paint a layer of PVA glue mixture on the outside of the jam jar.
3. Cover the jar with the bandage starting at the bottom and wrapping around to the top.
5. Once the jar is dry, stick the googly eyes on the jar.
6. Place a battery-operated tea light inside to create a glowing lantern effect!
Spooky pumpkin witch wand
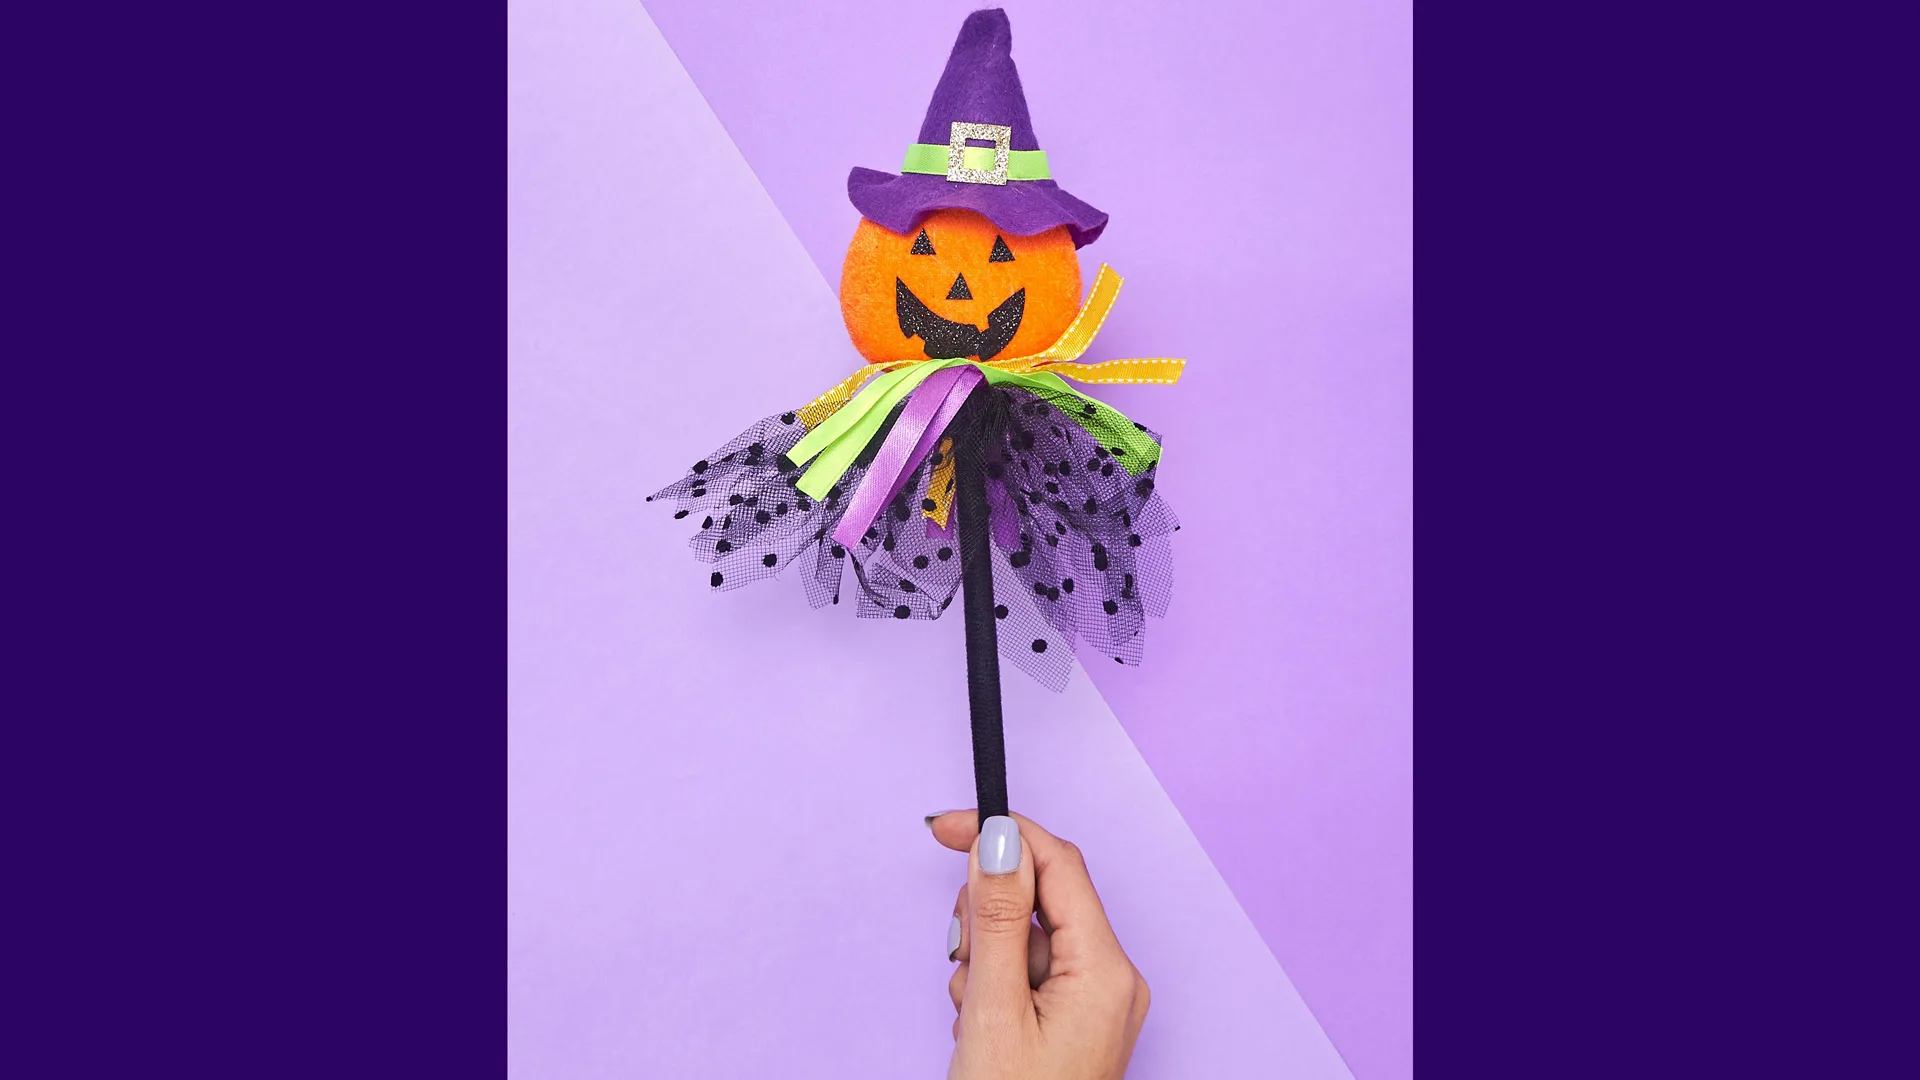
Wave this magic wand around for ultimate spell-casting and witchy protection!
Materials:
Orange foam ball or mini foam pumpkin
Black marker or black felt pen
Purple felt pen
Green ribbon
Wooden stick or pencil
Assorted ribbons (optional: purple, green, black)
Black netting (polka dots optional)
Glue or tape
Scissors
Instructions:
Make the Pumpkin Head:
Use the orange foam ball or mini foam pumpkin for the head.
Draw a simple jack-o’-lantern face with a black marker (triangles for eyes and nose, and a wide grin for the mouth).
Create the Witch Hat:
Cut a small cone shape from the purple felt.
Roll it into a cone and tape or glue the edges together.
Cut a circle from the purple felt for the brim and glue the cone on top to make the witch’s hat.
Attach the hat to the top of the pumpkin using glue.
Attach the Pumpkin to the Wand:
Use a wooden stick or pencil for the wand. Tape or glue the pumpkin head securely to the top of the stick.
Add Ribbon and Netting Skirt (Optional):
Cut a few pieces of ribbon (purple, green, black) and tie them around the netting then glue around the stick below the pumpkin to create a skirt effect.
Finish and Decorate:
Once everything is glued and secure, your pumpkin witch wand is ready to be waved around!
Halloween bat biscuits recipe
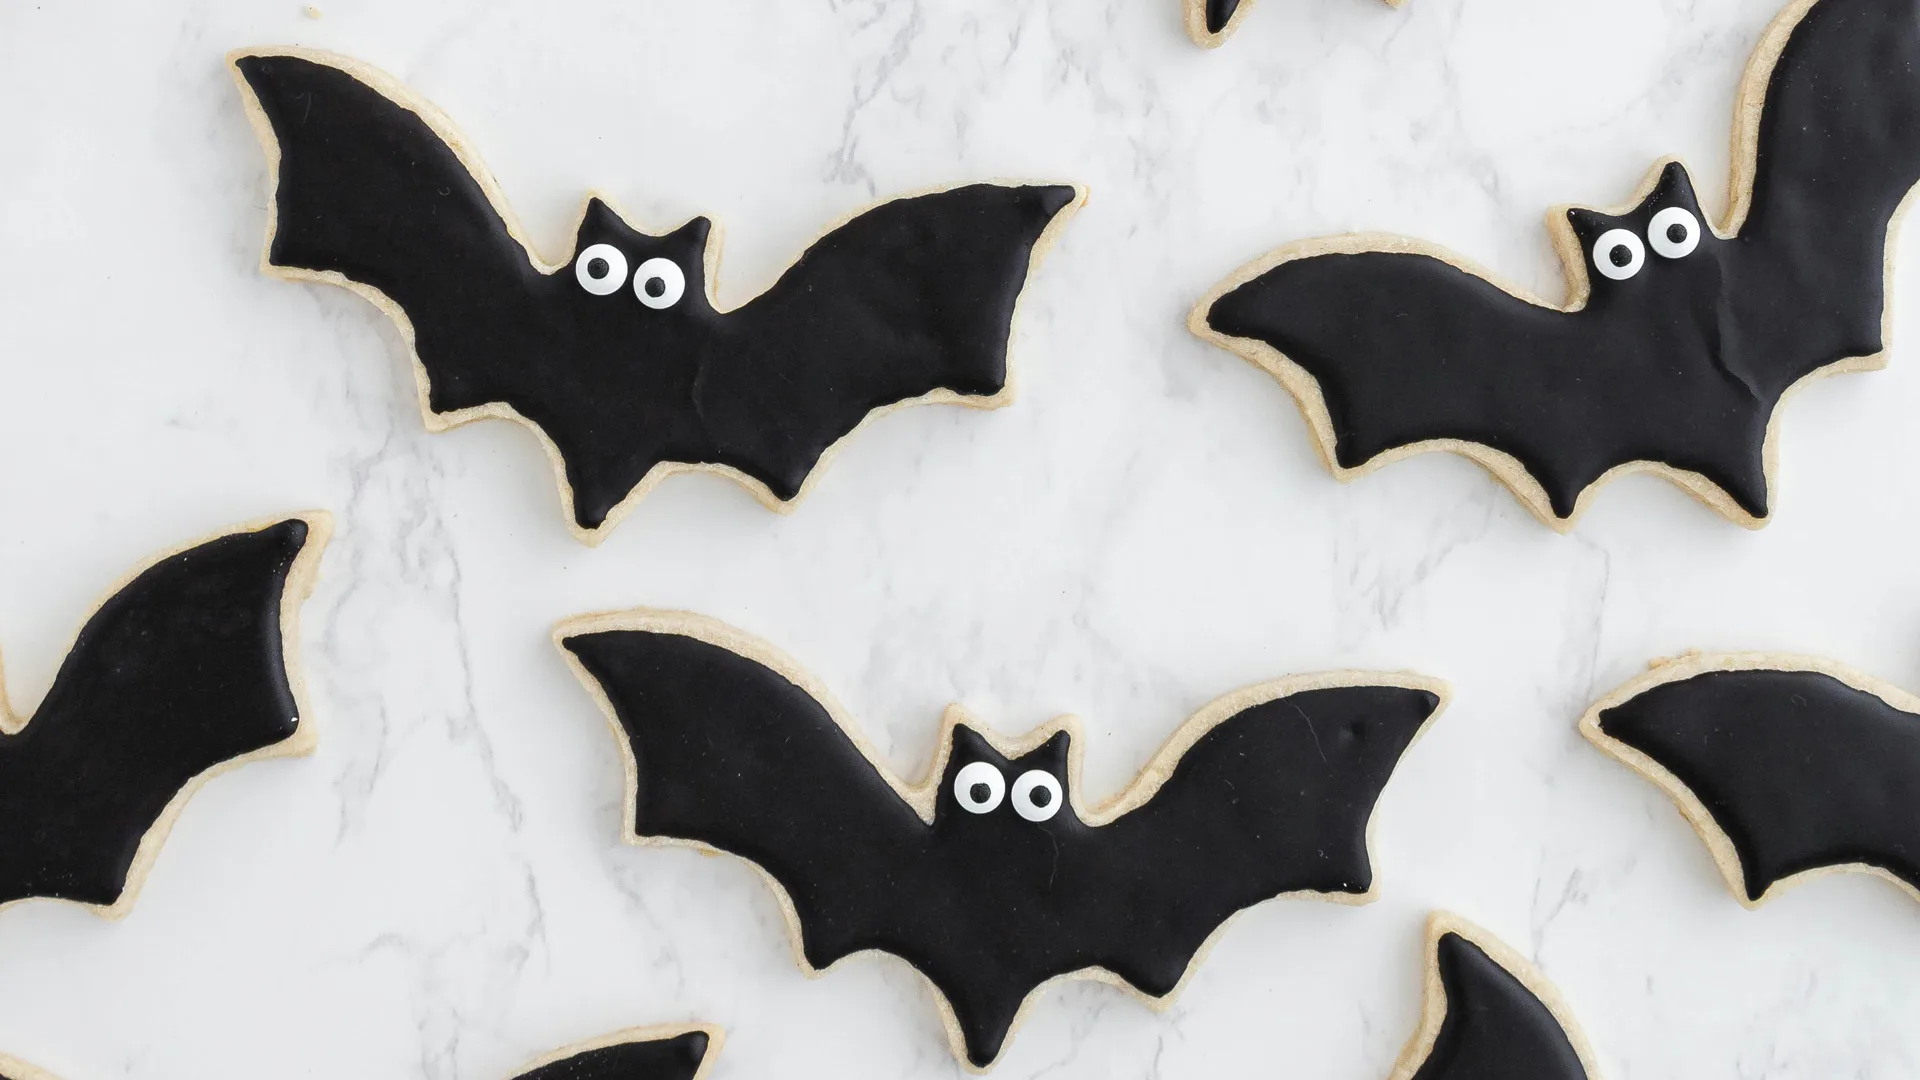
Nom nom nom! Just remember to share these tasty bat biscuits!
Ingredients:
100g unsalted butter (softened)
100g caster sugar
1 medium egg
1 tsp vanilla extract
225g plain flour (plus extra for dusting)
2 tbsp cocoa powder
Black icing or melted dark chocolate (for decorating)
White icing or sweetie eyes (for decoration)
Instructions:
1. Preheat your oven to 180°C (160°C fan) or Gas Mark 4. Line a baking tray with parchment paper.
2. In a large bowl, cream the softened butter and caster sugar together until light and fluffy.
3. Beat in the egg and vanilla extract.
4. In a separate bowl, mix the flour and cocoa powder. Gradually add this to the butter mixture until it forms a dough.
5. Lightly dust your work surface with flour. Roll out the dough to about ½ cm thickness.
6. Use a bat-shaped cookie cutter to cut out the bat shapes. If you don’t have a bat cutter, you can cut bat shapes freehand using a knife.
7. Place the bat shapes on the prepared baking tray and bake in the oven for 10-12 minutes or until firm. 8. Allow them to cool on a wire rack.
9. Once cooled, use black icing or melted dark chocolate to cover the bat biscuits.
10. Add white icing or stick on sweetie eyes to create spooky faces!
Halloween garland
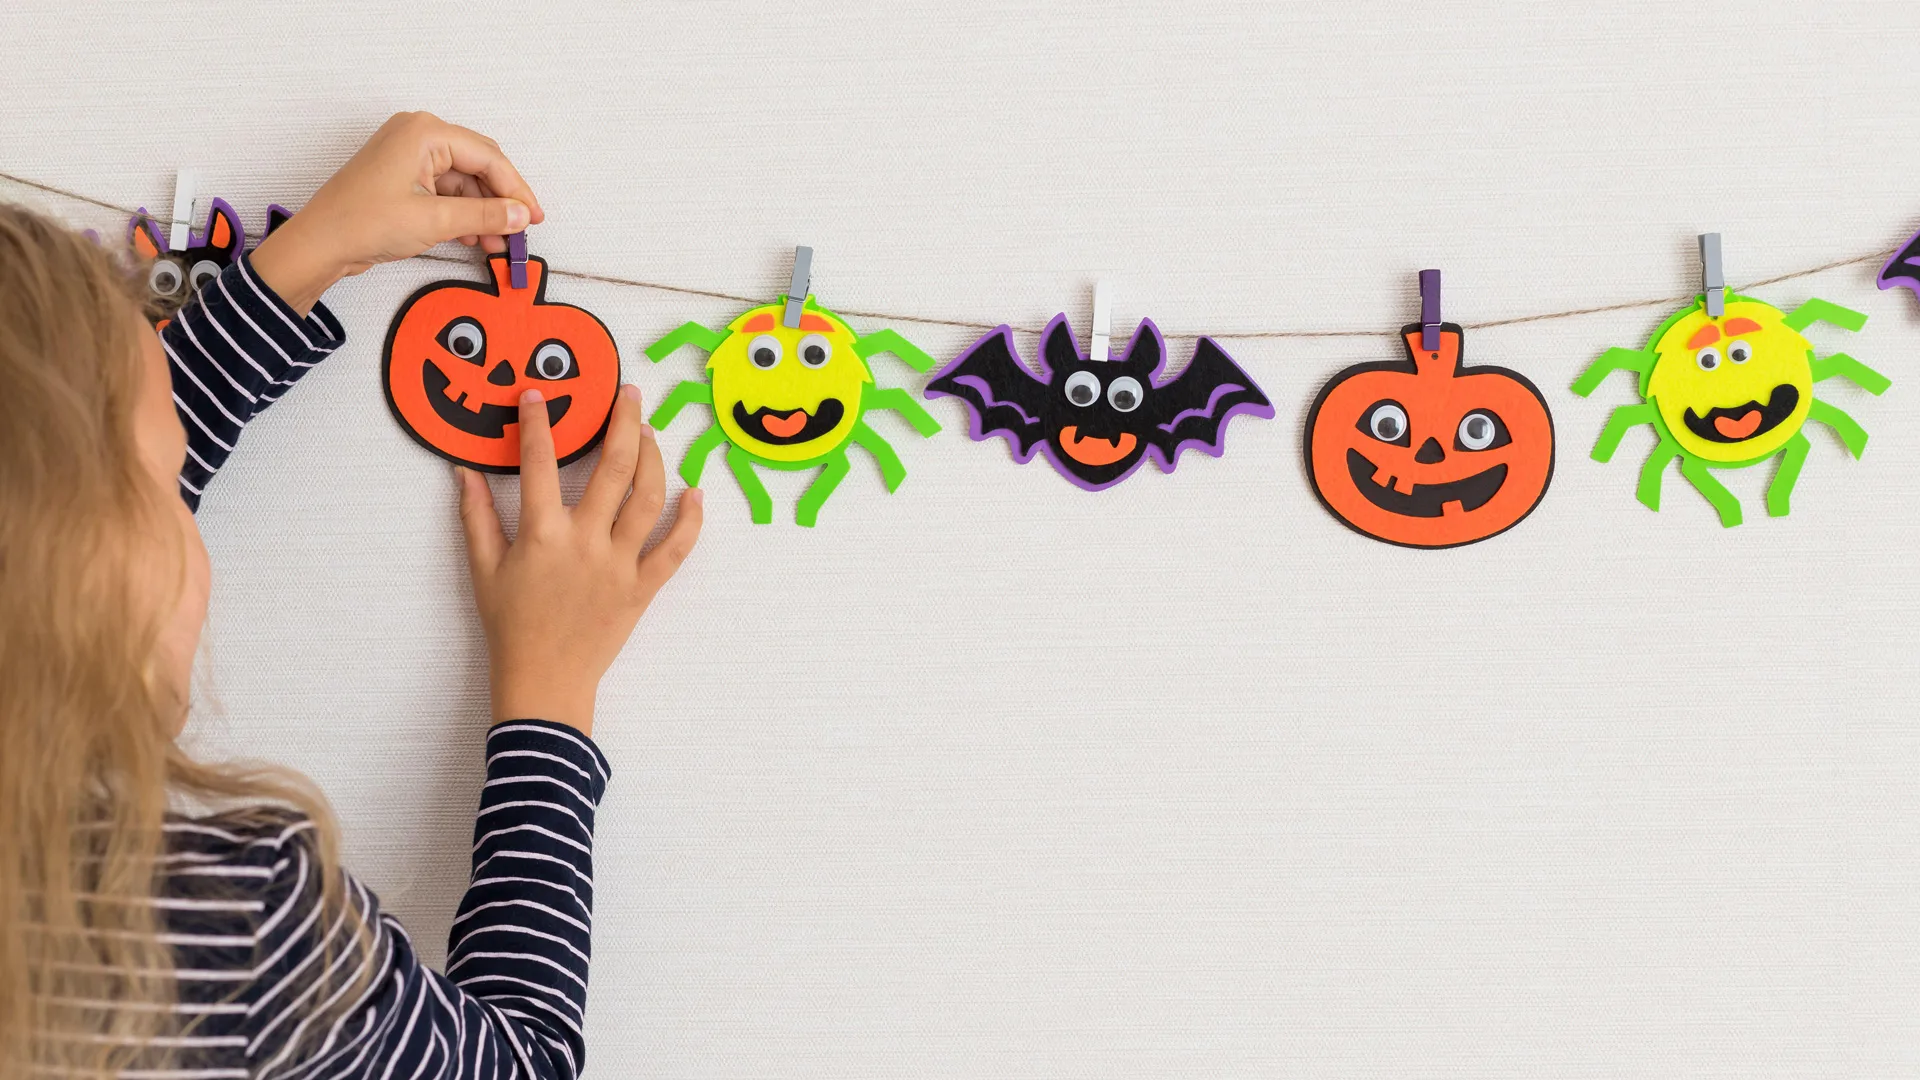
Perfect for a Halloween party or hanging on your door to greet trick or treaters!
Materials:
Coloured card or foam (black, orange, yellow, green, purple)
Googly eyes
Black pen
Scissors
Glue stick
String
Small pegs (or paper clips)
Instructions:
Cut Out Shapes:
Pumpkin: Cut pumpkins out of orange card or foam.
Spider: Cut big circles from green and yellow card or foam and thin strips for spider legs.
Bat: Cut bat shapes from black card or foam (you can draw simple wings and a body).
Add Faces:
Stick googly eyes onto each shape.
Draw smiles, teeth, and other facial features using a black pen. Make the pumpkin into a jack-o’-lantern, and give the spider and bat spooky expressions.
Assemble Characters:
Spider: Stick the green legs onto the sides of the spider’s circle body with glue.
Bat: Make sure the bat’s wings are visible, and add a fun face to it.
Attach to String:
Clip each character onto a piece of string using small pegs or paper clips.
Hang Your Garland:
Hang the garland on a wall, over a doorway, or anywhere you like!
For more fun Halloween content, browse through our Halloween quizzes and lists! Stay in that spooktacular mood!
Halloween personality quiz: How should I carve my pumpkin?
Top 10 objects to survive a nightmare
5 toxic treasures from the V&A museum
A brief history of vampires